That constant drip, drip, drip is more than just an irritating sound; it’s a clear sign of a problem. A leaky faucet might seem like a minor issue you can put off, but it’s a significant source of water waste and can lead to surprisingly high utility bills. A persistent faucet leak points to an underlying plumbing issue that needs attention. This guide will walk you through why you should never ignore a dripping faucet and how you can address the problem yourself.
The Hidden Dangers of a Dripping Faucet
The financial cost of a leaky faucet can be staggering. Even a minor leak can add a hundred dollars or more to your water bills over a year. A more significant faucet leak, wasting over 30 gallons daily, puts a considerable dent in your wallet. When you consider that every drop is water you pay for but never use, the need for a quick repair becomes clear.
Beyond your personal finances, there is a broader environmental impact to consider. In the United States, household leaks contribute to wasting nearly 1 trillion gallons of water each year. A single home with a dripping faucet can waste up to 10,000 gallons annually.
By fixing a faucet leak promptly, you not only save money but also contribute to water conservation efforts. It’s a small action with a significant positive effect on both your budget and the environment. Are you letting your money and precious resources drip away?
How Ignoring a Leak Can Lead to Bigger Problems
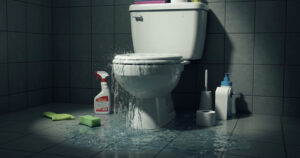
Yes, a continuously dripping faucet can absolutely cause water damage. A persistent faucet leak creates a constant source of moisture that can seep into areas you can’t easily see. Water can accumulate under the sink, inside your cabinets, and even soak into the subfloor or behind walls, leading to rot and structural decay.
Furthermore, these damp, dark spaces are ideal breeding grounds for mold and mildew. Mold growth not only damages the surfaces it grows on but can also pose serious health risks to you and your family, especially for those with allergies or respiratory issues.
What starts as a simple leaking faucet can escalate into a major home repair project. Taking care of the leak promptly prevents these bigger, more expensive problems from developing, protecting your home and your health.
Common Reasons Faucets Start Dripping
If you have a leaky faucet, chances are the cause is one of a few common culprits. For most household faucets, the issue stems from a small, worn-out internal component that is relatively easy to replace. Understanding what causes a leaking faucet is the first step toward fixing it.
Worn-Out Washers and O-Rings
One of the most common causes of a faucet leak, particularly in compression faucets, is a broken or worn-out washer. The washer is a rubber disc that rests against the valve seat, creating a seal to stop water flow. Over time, the constant friction from turning the faucet on and off wears down the washer, causing water to seep through.
Another frequent offender is the O-ring. This small rubber ring is located at the base of the faucet handle and creates a seal to prevent water from leaking out around the handle itself. With years of use, an O-ring can become loose or deteriorate, leading to a visible drip around the handle area.
Both of these parts are inexpensive and relatively simple to replace. If you notice your leaky faucet is dripping from the spout or handle, there’s a strong possibility that a worn washer or O-ring is to blame.
High Water Pressure Issues
Sometimes, the problem isn’t with the faucet itself but with your home’s water pressure. Have you noticed that your faucet only seems to drip at certain times of the day or starts leaking whenever you use another water fixture in the house, like a shower or toilet? This could be a sign that your water pressure is too high.
High pressure puts excessive strain on your entire plumbing system, including the seals and components inside your faucets. This constant stress can cause parts to fail prematurely, resulting in a persistent faucet leak. The ideal residential water pressure is typically between 40 and 60 psi.
If you suspect high water pressure is the cause of your leaking faucet, this is not a typical DIY fix. It is best to call a professional plumber. They can test your home’s pressure and, if necessary, install a pressure regulator to protect your pipes and fixtures from damage.
Corroded Valve Seats and Seals
If your faucet is dripping from the spout, a corroded valve seat could be the issue. The valve seat is the component that connects the faucet to the spout, and it works with the washer to create a seal. Over time, sediment and mineral deposits from the water can build up on the valve seat, causing it to corrode.
This corrosion creates an uneven surface, preventing the washer from sealing properly and allowing water to drip through. In addition to the valve seat, inlet and outlet seals within the faucet can also wear down. Water sediment collects on these seals, speeding up their deterioration and leading to a leaky faucet.
Cleaning the valve body with white vinegar can sometimes remove mineral buildup, but if the part is heavily corroded, it will need to be replaced. This is another common cause that can often be resolved with a simple parts replacement.
Step-by-Step Guide to Repairing a Leaky Faucet
Ready to tackle that leaky faucet yourself? The good news is that many faucet repairs are straightforward and don’t require extensive plumbing knowledge. With a little preparation and the right tools, you can often stop a drip in under an hour, saving yourself the cost of a service call.
Before you begin, it’s crucial to gather all the necessary supplies to ensure the repair goes smoothly. The following sections will guide you through the entire process, from turning off the water to reassembling your newly repaired faucet.
What You’ll Need to Get Started (Tools & Supplies)
Having the right tools simplifies DIY repairs. For a leaking faucet, you won’t need specialized equipment—most items are available at a local hardware store or in your toolbox. Essential tools include:
- Adjustable wrench or pliers
- Flathead and Phillips screwdrivers
- Allen wrench
- Replacement parts (O-rings, washers, seals)
- Plumber’s grease and white vinegar for cleaning
The key is obtaining the correct replacement parts. Disassemble the faucet first and bring the old parts to ensure you buy exact duplicates for a proper fit and successful repair.
Step 1: Turn Off the Water Supply
The most important step in any plumbing repair is to shut off the water supply before you begin. Attempting to work on the faucet with the water on will result in a flood in your kitchen or bathroom. Look for the fixture shutoff valves located in the cabinet directly beneath the sink.
You should see two handles—one for hot water and one for cold. Turn both handles clockwise until they are firmly closed. If your sink doesn’t have these valves, you will need to turn off the main water supply to your entire house.
Once you have turned the valves, test your work by turning the faucet handles on. If no water comes out, you have successfully shut off the supply. It’s also a good idea to plug the drain with a rag or stopper to prevent any small screws or parts from accidentally falling down the drain during the repair.
Step 2: Disassemble and Inspect Faucet Components
With the water off, you can now start taking the faucet apart. The process for removing the handles will vary depending on your faucet type. Many have a decorative cap on top that you can pry off with a flathead screwdriver to reveal a screw. Unscrew it and gently pull the handle off.
Once the handle is removed, you will see the inner components, such as the packing nut and the valve stem or cartridge. These will also need to be removed. A compression faucet typically has a brass valve stem that can be unscrewed, while a cartridge-style one can often be pulled straight out.
As you remove each part, inspect it carefully. Look for signs of wear, cracks, damage, or mineral buildup. This inspection will help you confirm which component is causing your leaky faucet and needs to be replaced.
Step 3: Replace Damaged Parts and Reassemble
After you have identified the faulty parts and purchased exact replacements, it’s time to put everything back together. Before installing the new components, it’s a good practice to clean the inside of the valve body. Pour a small amount of white vinegar over the area to dissolve any mineral buildup, then gently scrub it away.
Install the new parts, such as the washer and O-ring, in the reverse order you removed them. A light coat of plumber’s grease on the new O-rings can help ensure a good seal. Reassemble the rest of the faucet, putting the stem, packing nut, and handle back in place.
Once the faucet is fully reassembled, turn the water supply back on slowly. Open the faucet and check for any leaks. If the dripping has stopped, you have successfully completed the repair.
Get Your Plumbing Running Smoothly Again—Call Target Plumbers
While many faucet leak issues can be a simple fix, some problems are more complex or may not be resolved with a DIY attempt. If you’ve replaced the parts and your leaky faucet is still dripping, or if you suspect a more serious issue like high water pressure or a broken pipe, it’s time to call in the professionals. Don’t let a small leak turn into major water damage.
Here at Target Plumbers, our team of licensed technicians is ready to help. We can quickly diagnose the source of any faucet leak and provide reliable, long-lasting plumbing repairs. Whether you need a simple part replacement or have a more complicated plumbing problem, you can trust us to get the job done right and prevent further issues.
Conclusion
Ignoring a dripping faucet can lead to more significant problems than just irritation. As we’ve discussed, that constant drip not only wastes water but can also indicate underlying issues that, if left untreated, could result in costly repairs or even water damage to your home. By addressing the problem promptly, you save money and protect your property from potential harm. Remember, regular maintenance and timely repairs are essential for a healthy plumbing system.
Dripping taps are more serious than they seem. We covered this in our Essential Plumbing Guide for Homeowners—don’t miss it.
Frequently Asked Questions
How much water can a dripping faucet waste in a day?
A single leaky faucet can have a big impact on water waste. A larger faucet leak can waste more than 30 gallons of water every day. Over a year, even a slow drip of just one drop per second can waste over 3,000 gallons.
Can a dripping faucet cause water damage to my home?
Yes, a persistent faucet leak is a serious threat for water damage. Constant moisture can rot cabinets, damage flooring, and saturate drywall. This damp environment is also a perfect breeding ground for harmful mold and mildew, creating a more significant and costly problem.
When should I call a plumber instead of fixing it myself?
You should call a plumber if you’re not comfortable with DIY repair, if the leak continues after your fix, or if you suspect a larger issue. Problems like high water pressure, a corroded valve seat you can’t remove, or a potential broken pipe require professional expertise.
What tools do I need to repair a leaky faucet?
For most leaky faucet repairs, you will need basic tools like an adjustable wrench, flathead and Phillips screwdrivers, and possibly an Allen wrench. You will also need the specific replacement parts for your faucet, such as new washers, O-rings, or seals.